Installing the AURORAL Node
Only users with System integrator role are able to create AccessPoint.
0 – Pre-Requirements
Software requirements
- Docker and Docker-compose
- WSL2 for Windows users (Recommended Ubuntu or Debian as Linux distribution)
Docker and Docker-compose
Please install Docker and Docker-compose using these official guides: – https://docs.docker.com/get-docker/ – https://docs.docker.com/compose/install/
Minimal Hardware requirements
- At least 2GB free storage
- At least 1GB RAM
- System architecture amd64, arm64 or arm32v7 (Modern personal computer, cloud server or Raspberry Pi)
1 – Download AURORAL Node
This guide was created on Mac but all steps are the same for Linux and Raspbian, for Windows users please refer to the Windows Node Installation tutorial.
- Download packed node from GitHub repository https://github.com/AuroralH2020/auroral-node
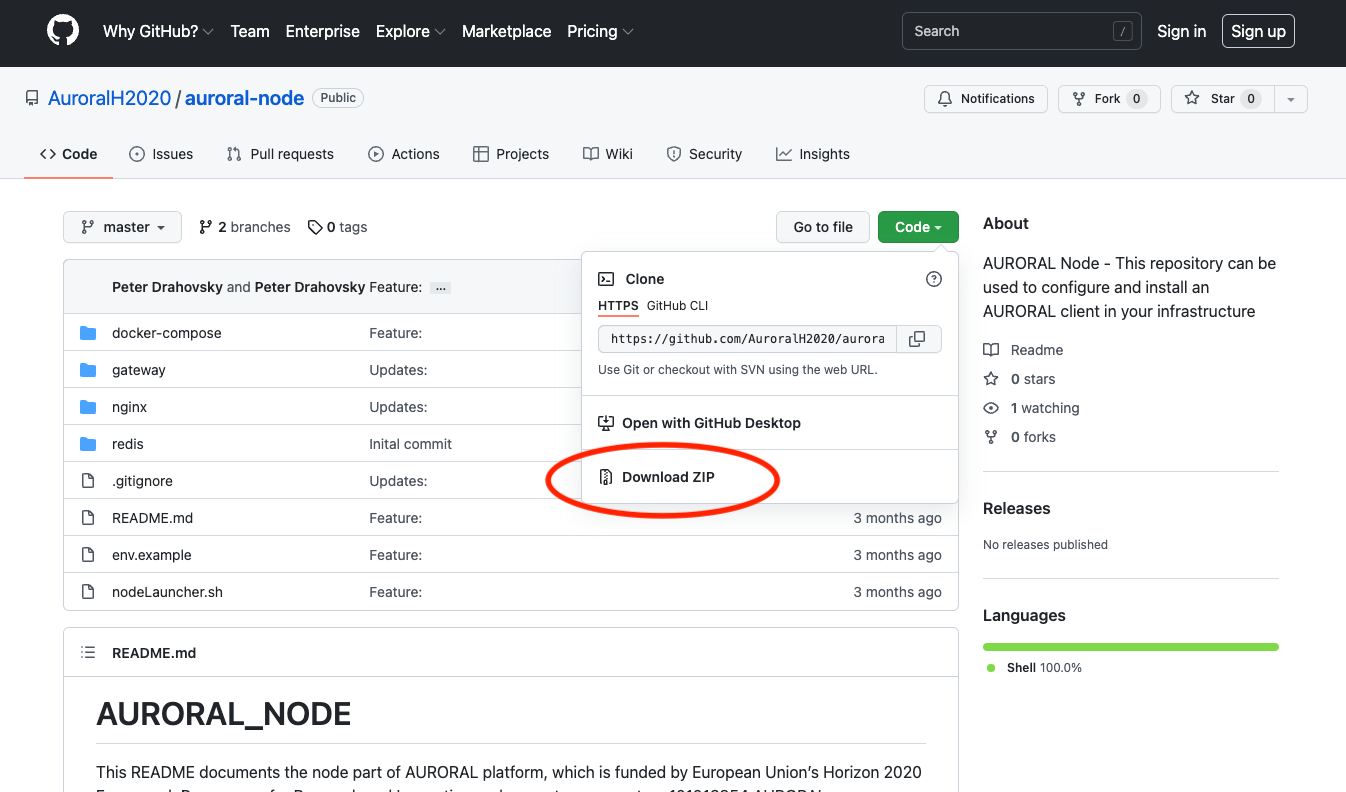
Note: When downloading Node, by default we will get the last version. It is possible to download an older release, however, in that case it is necessary to update the docker-compose file and use compatible versions of the Gateway and the Agent.
Unzip it to desired location. The Node will run in this folder, so you should not remove it afterwards
Once unzipped there will be several files available, the same as in GitHub
There is a script called node_cli to help with first initialisation of the Node. We will show how to use it with the terminal.
2 – Installing the Node
- Open terminal (in Mac right click on folder –> New terminal at folder)
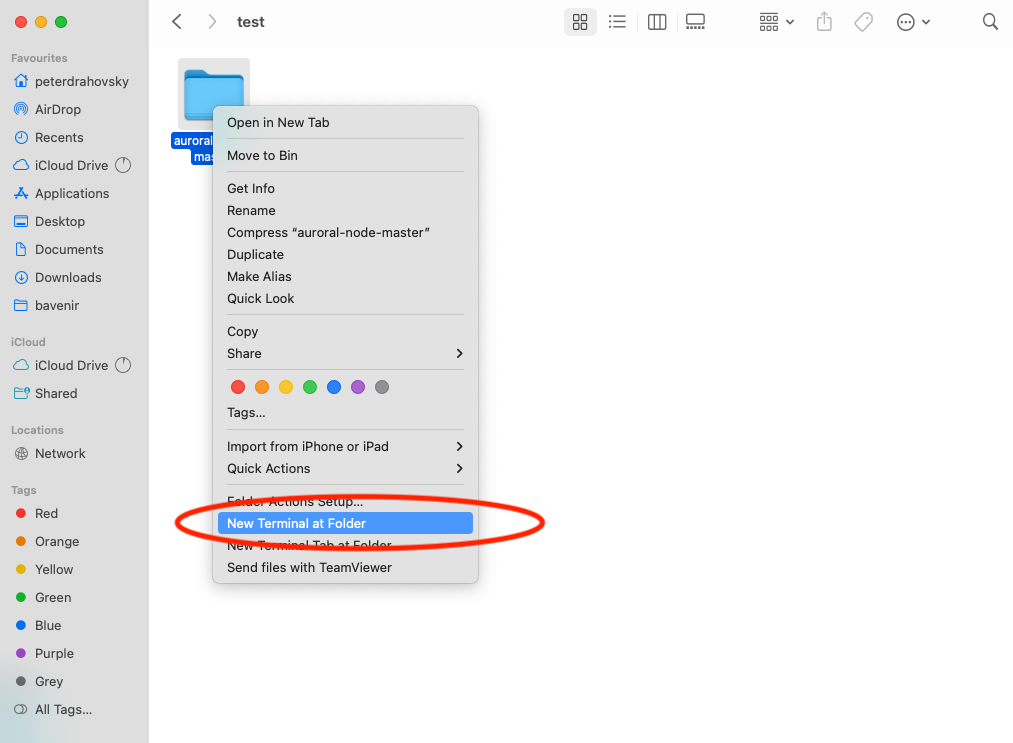
Type there “ ./node_cli “
Now you need to go through set of questions. To answer them type proper number and hit enter.
| Question | Recommended answer |
|---|---|
| Production mode | 1 |
| Use default external port | 1 |
| Extensions | ? |
| Adapter mode | ? |
Note: For basic users it is recommended to use Production servers.
Note: In case you only have one Node in your PC/HW please use default port (81). If you plan to install more, any new one should be running in a different port (i.e. 82, 83, ...)
Note: The extensions are AURORAL developed adapters and plugins that might be installed at the same time of starting the Node. Some popular extensions are the Node-Red and semantic adapters. New extensions will be included with the Node releases.
Note: If you choose no extensions, you will be asked for the adapter mode. Please check this [entry]() for more info.
Extensions
- At the time of writing this article, installer includes two extensions:
- Node-RED adapter – programatical adapter
- Helio adapter – semantic adapter
- You can choose one of these prepared adapters, or use Node only with API endpoints.
Adapter mode
- If you do not choose any prepared extension, you need to specify adapter mode which will be used:
- dummy – dummy response, and could be used for testing purposes
- proxy – forwarding requests to your server in standard URL format (http://HOST:PORT/api/event | property/OID/PID)
- semantic – requested data are obtained using URL from ThingDescription
Note: If you choose one of the adapter extensions, the adapter mode will be configured for you according what is best for the selected extension
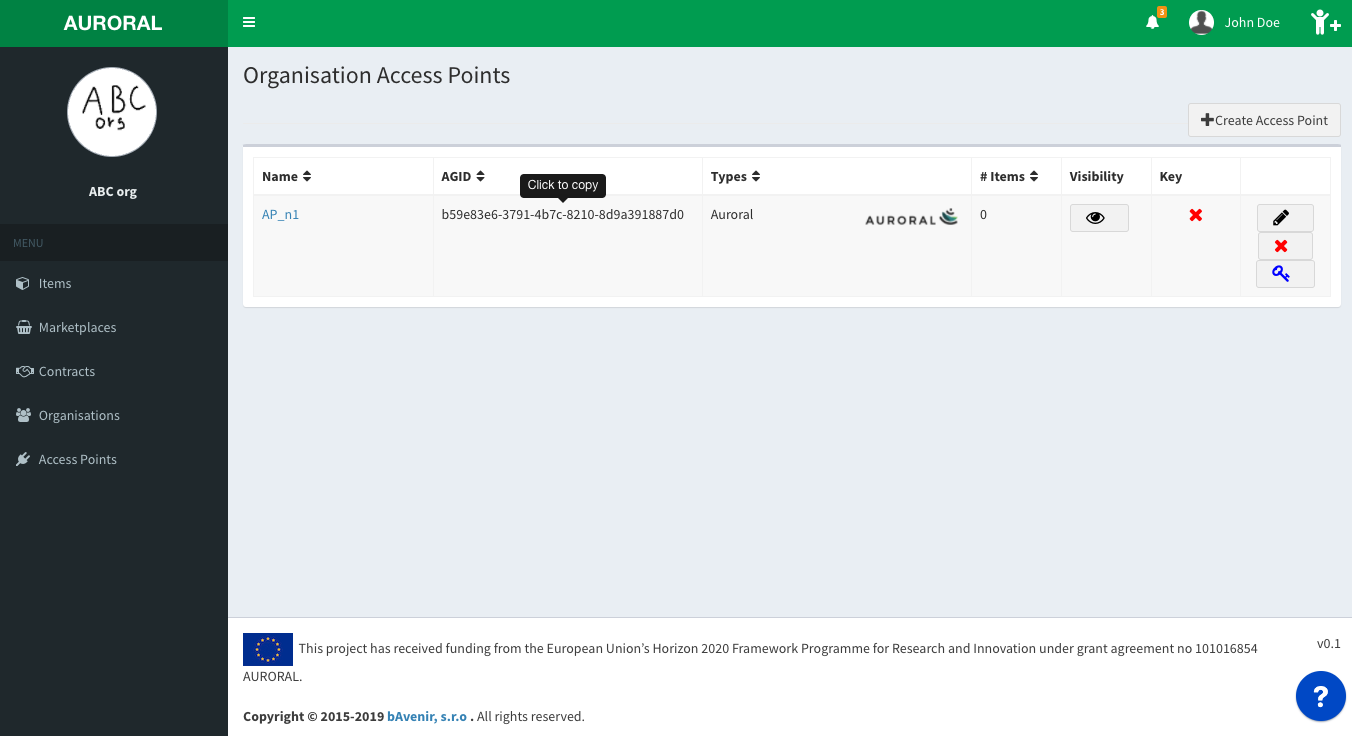
When you are prompted to type AGID, you need to create AP in Auroral dashboard https://auroral.dev.bavenir.eu/nm/#!/myNodes
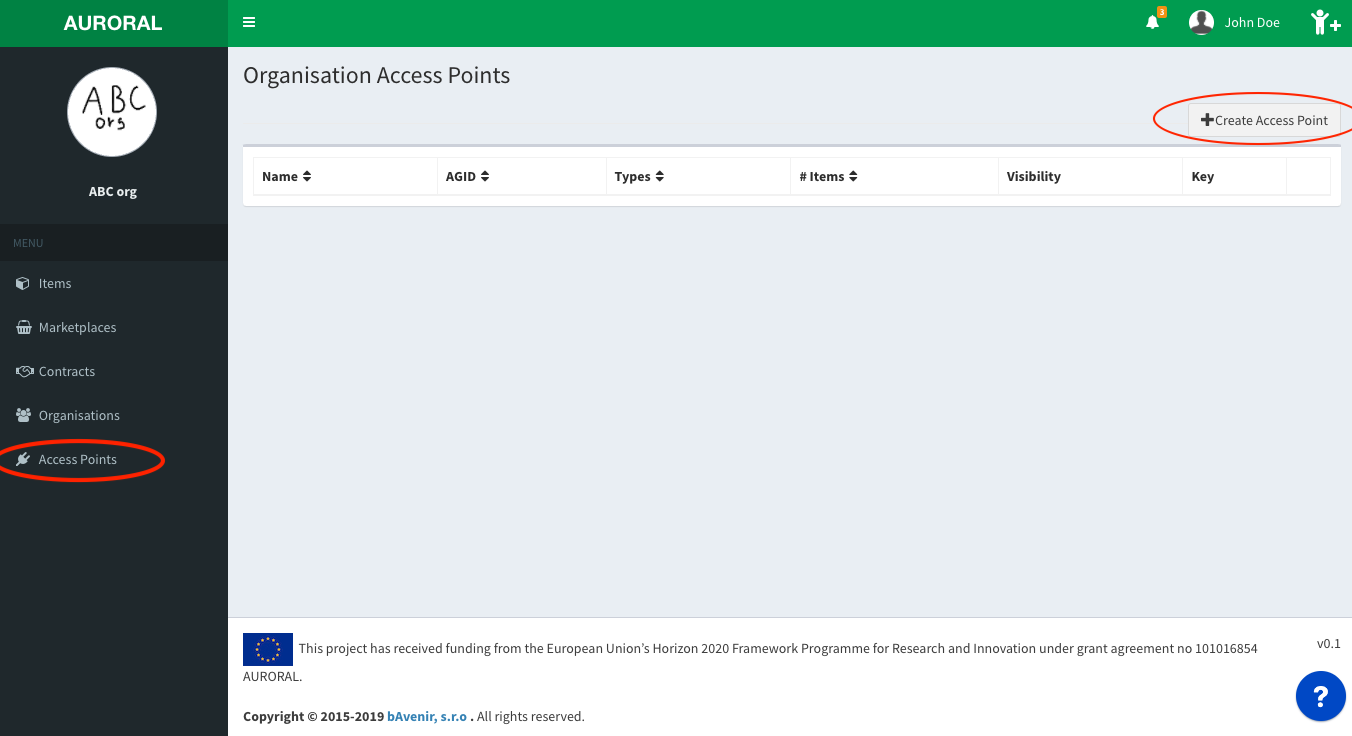
Now fill all fields properly.
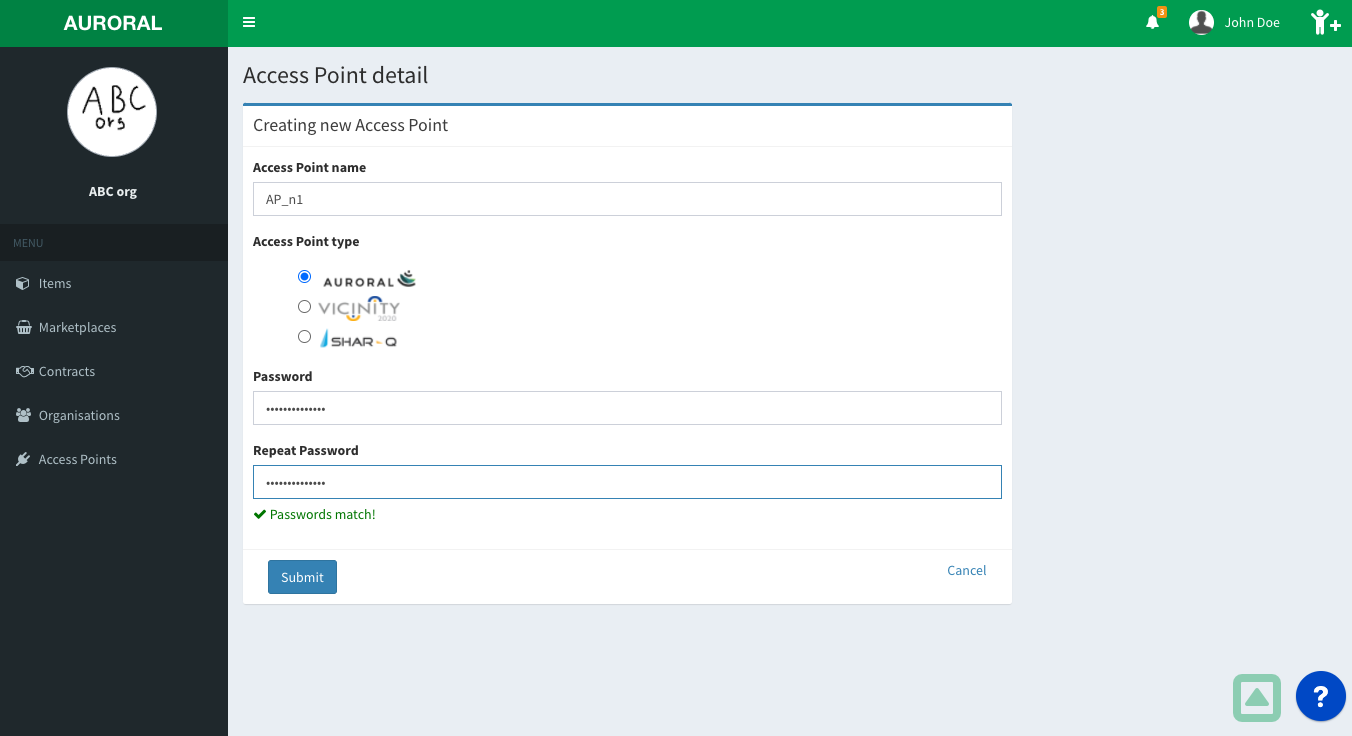
Click to copy AGID and paste it to node_cli (in terminal)
- Type same password as you filled in Neighbourhood Manager
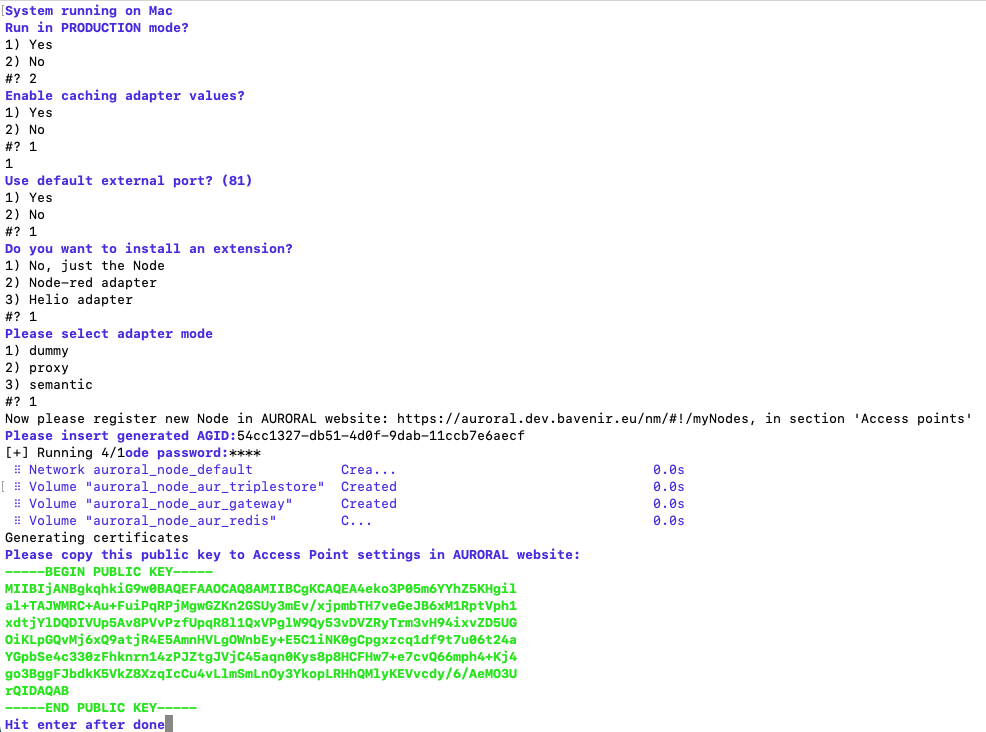
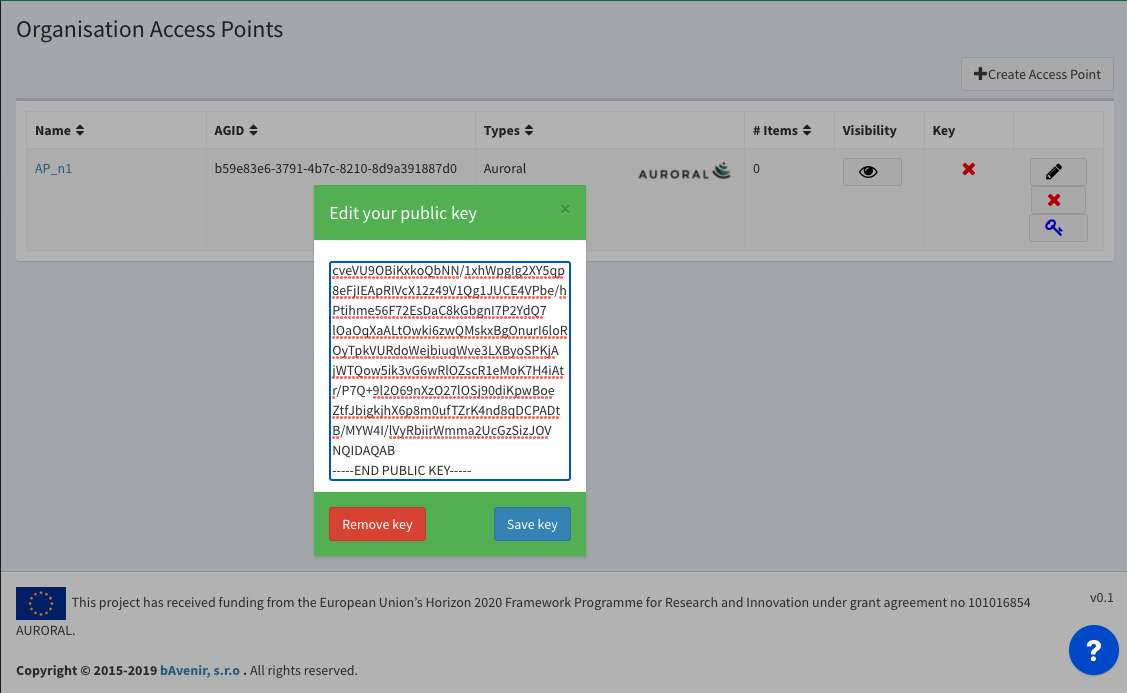
- Now your encryption keys are generated. Copy green text from terminal, paste it to Modify public key dialog in Neighbourhood manager (accessible under blue key button) and save
Now you can hit enter in terminal, and choose to start node now (1)
This step takes some time, in background you are now downloading all resources required by the AURORAL Node Client
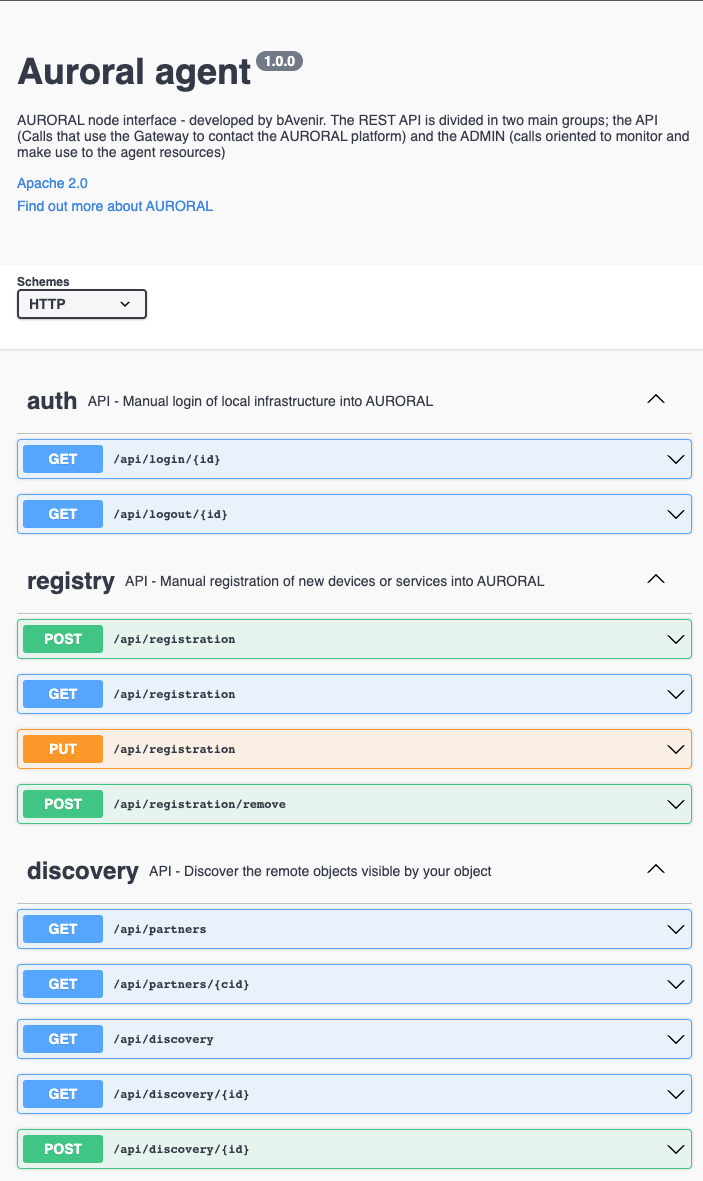
You have deployed an AURORAL Node in your computer. The Swagger UI (API description) is accessible on http://localhost:81 (if you are accessing the browser in the same machine where you installed the Node)
Brought to you by the AURORAL community, keep posted! 💪